How to Share Guide Links?
Chethna
Updated on Jul 15, 2025
How to Share Guide Links?
Trainn makes it easy to share your guides using simple, customizable links. Whether you're sharing guides with learners, you have control over who can view it through these shareable links.
You can customize these links :
To allow anyone with the link to view the guide
Restrict guide access to specific learners or learner groups
Revoke the guide access anytime
This flexibility helps the guides to reach the right learner without downloading or uploading anything extra.
The changes that are made in the privacy settings will also affect any embedded guides.
Default Link Sharing
The instant way to share your guides in Trainn is using the Copy Share link. This link automatically adapts to your current privacy settings, eliminating the need to navigate to settings each time you want to share.
Note: By default, this creates a public access link that allows anyone with the link to view your guide.
Step
Click on Copy Shareable Link on the top right side of the guide published page, the link will automatically be copied to the clipboard.
Privacy Settings for Sharing
Control who can access your guide by configuring the privacy level/ modes of your shareable links.
Steps
Navigate to the published guide page, and click on Share and Export Options
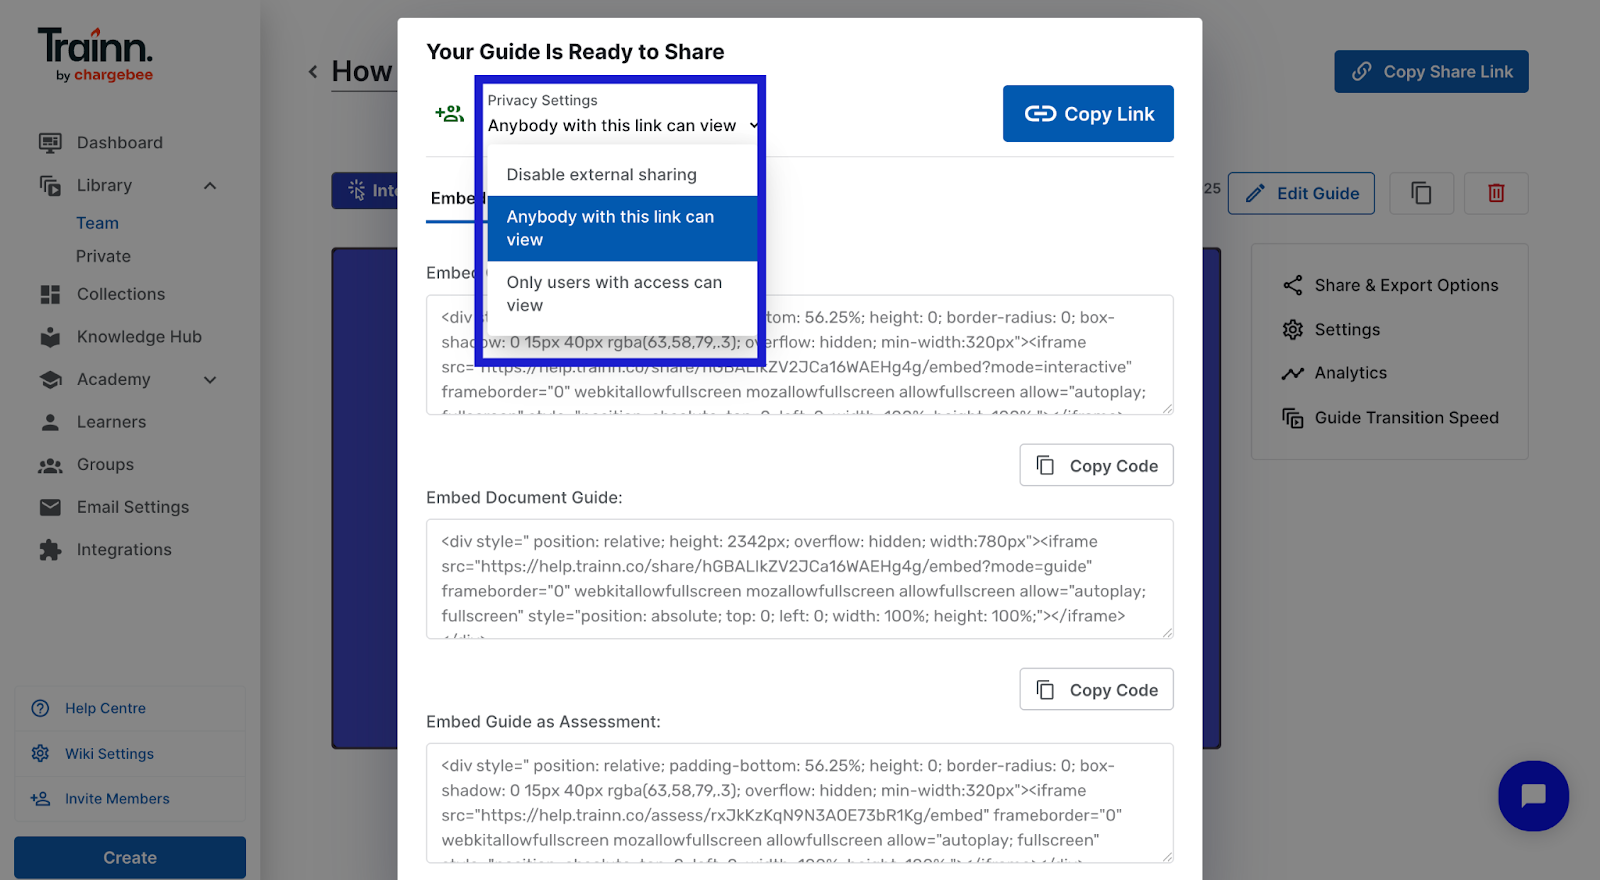
From the sharing window, click the dropdown under Privacy settings and select the privacy mode/level for the links:
1. Anybody with the link can view ( Default )
2. Only users with access can view
3. Disable external sharing
Anybody with the link can view
This is the default setting in Trainn. It means if you copy the link and share it, anybody with the link can access and view the guide.
Steps
Click on Copy link to share the link.
Share by Ctrl+V or by copy-pasting in your email, slack, support chat, etc.
2. Only users with access can view
This option restricts accessing the guide to specific learners whom you authorize. You can make the guide accessible to your learners by directly choosing from your account or authorizing them through their email address.
Method 1: Add learners via email
In this method, you will have to first add the learner via email.
Steps
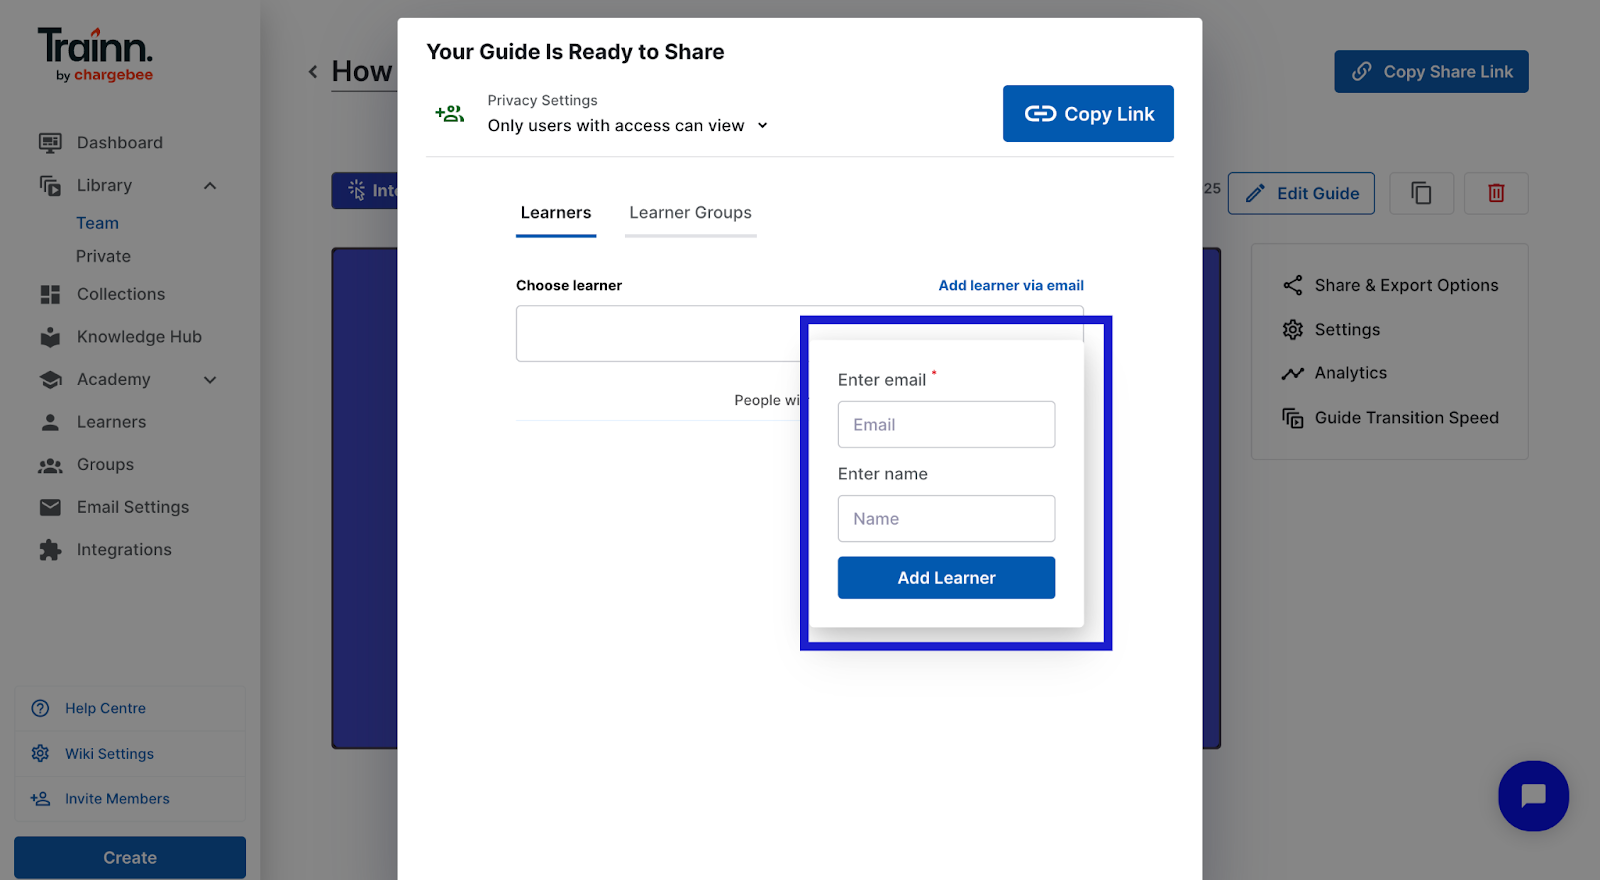
Click on add learner via email.
Enter the learner’s email address in the Enter Email box and the name in the Enter name (optional) box.
Click Add Learner
Click on the Copy Link to share the link.
Important: The added learner will not receive an invitation email. But once they click on the shared link, they will be taken to a login page, where they will have to sign up with the email, that you provided while adding the learner.
Once this is done, the user will be added as a learner.
Note: Once you shift the privacy settings to Only users with access can view, then any guides embedded externally, will start showing a login page.
Method 2: Add learners from your account
This method can only be accessed if you are part of the Plus, Grow, and Business plan and you have access to learners and learner groups.
Steps
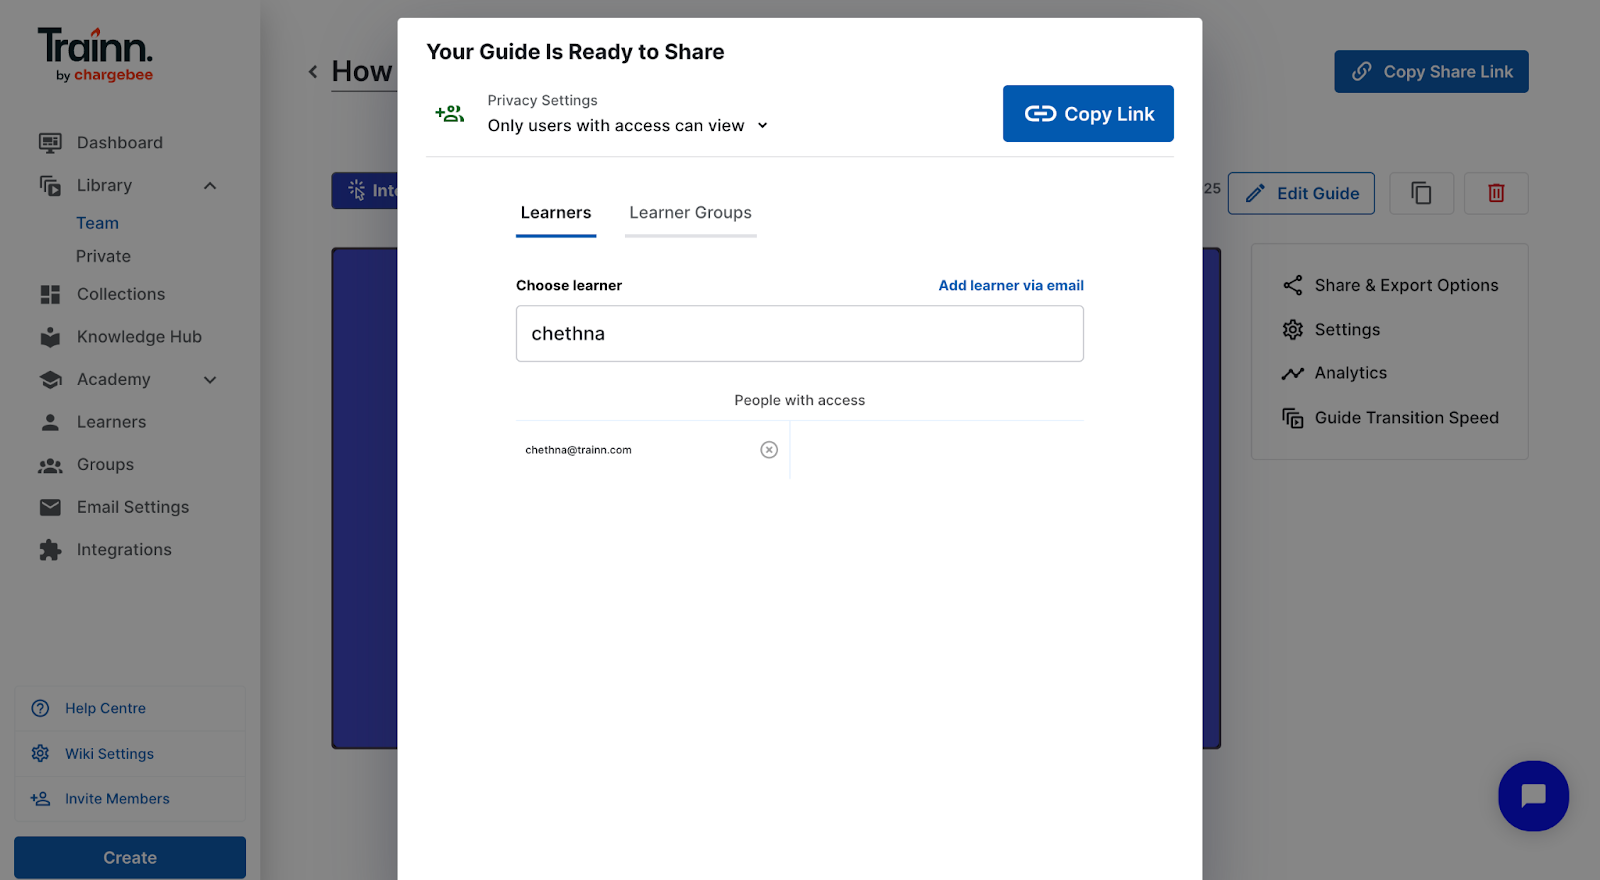
Enter the learner name in the search box and select the appropriate learner from the results.
Note: If the learner name does not show up in the search results. The intended user might not be a learner yet.
Once, the learner is added, click on Copy Link to share the link.
Important: the learner will not receive an email. But once they click on the shared link, they will be taken to a login page, where they will have to sign up with the email and also enter OTP which will be sent to their email address.
Method 3: Give access to a learner group
Note: A learner group is a group of learners set up based on user persona. This feature is only available from Plus, Grow, and Business plan.
Steps:
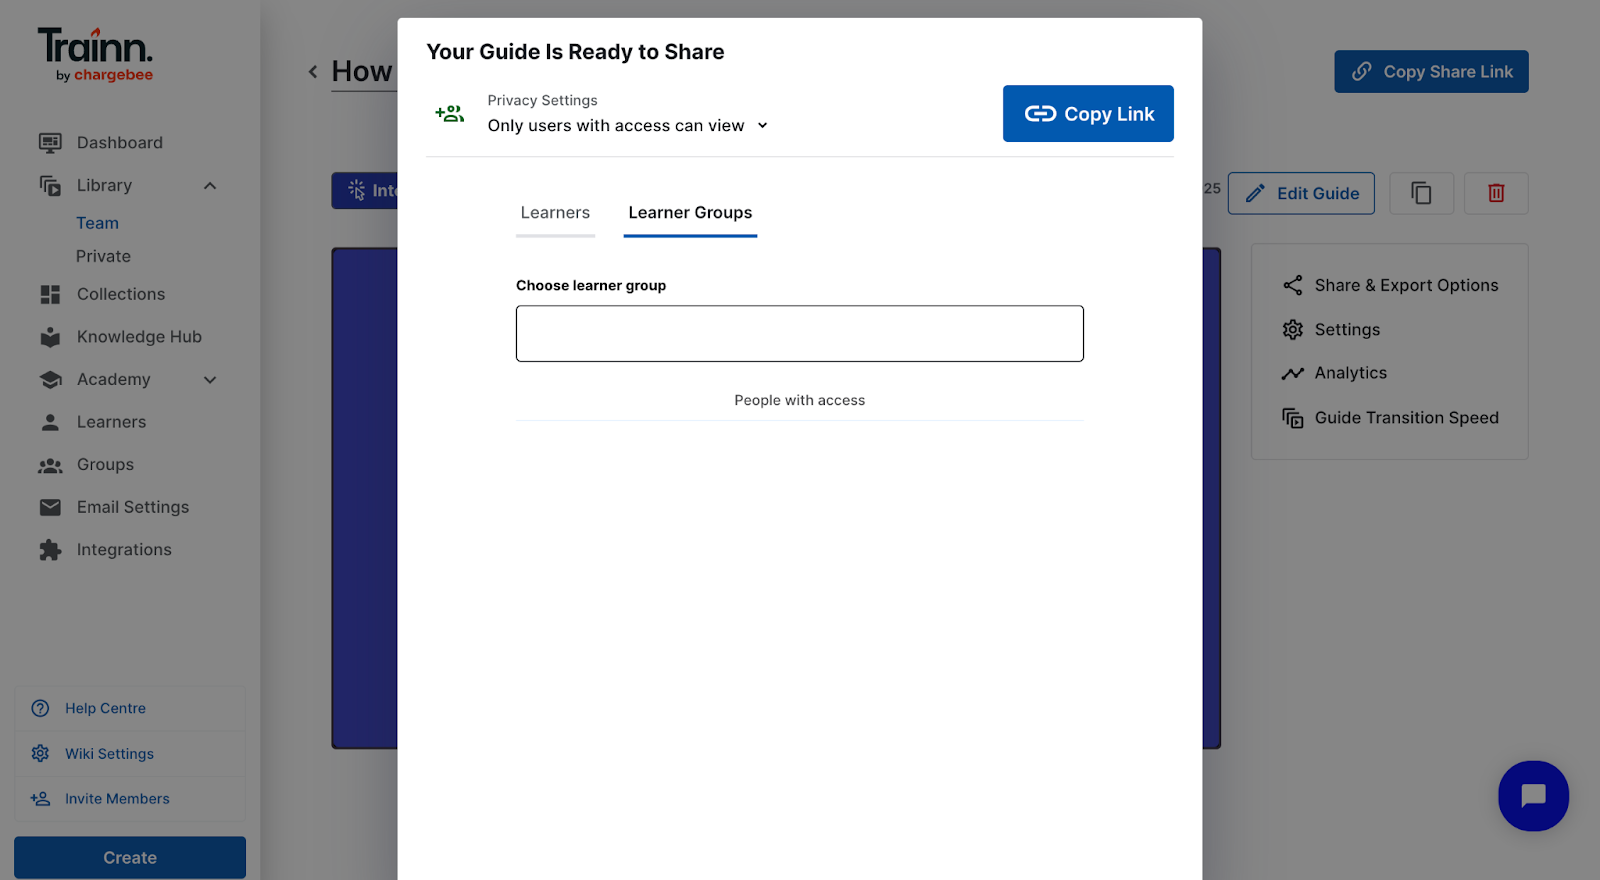
Navigate to the Learner group tab
Enter the Learner group name in the search box and select the appropriate learner group from the results
Click on Copy link to share the link
3. Disable External Sharing
This option lets you revoke access to a previously shared link. Once disabled, anyone who had access to the link will no longer be able to view the guide. This makes it accessible to the admin/ user who created.
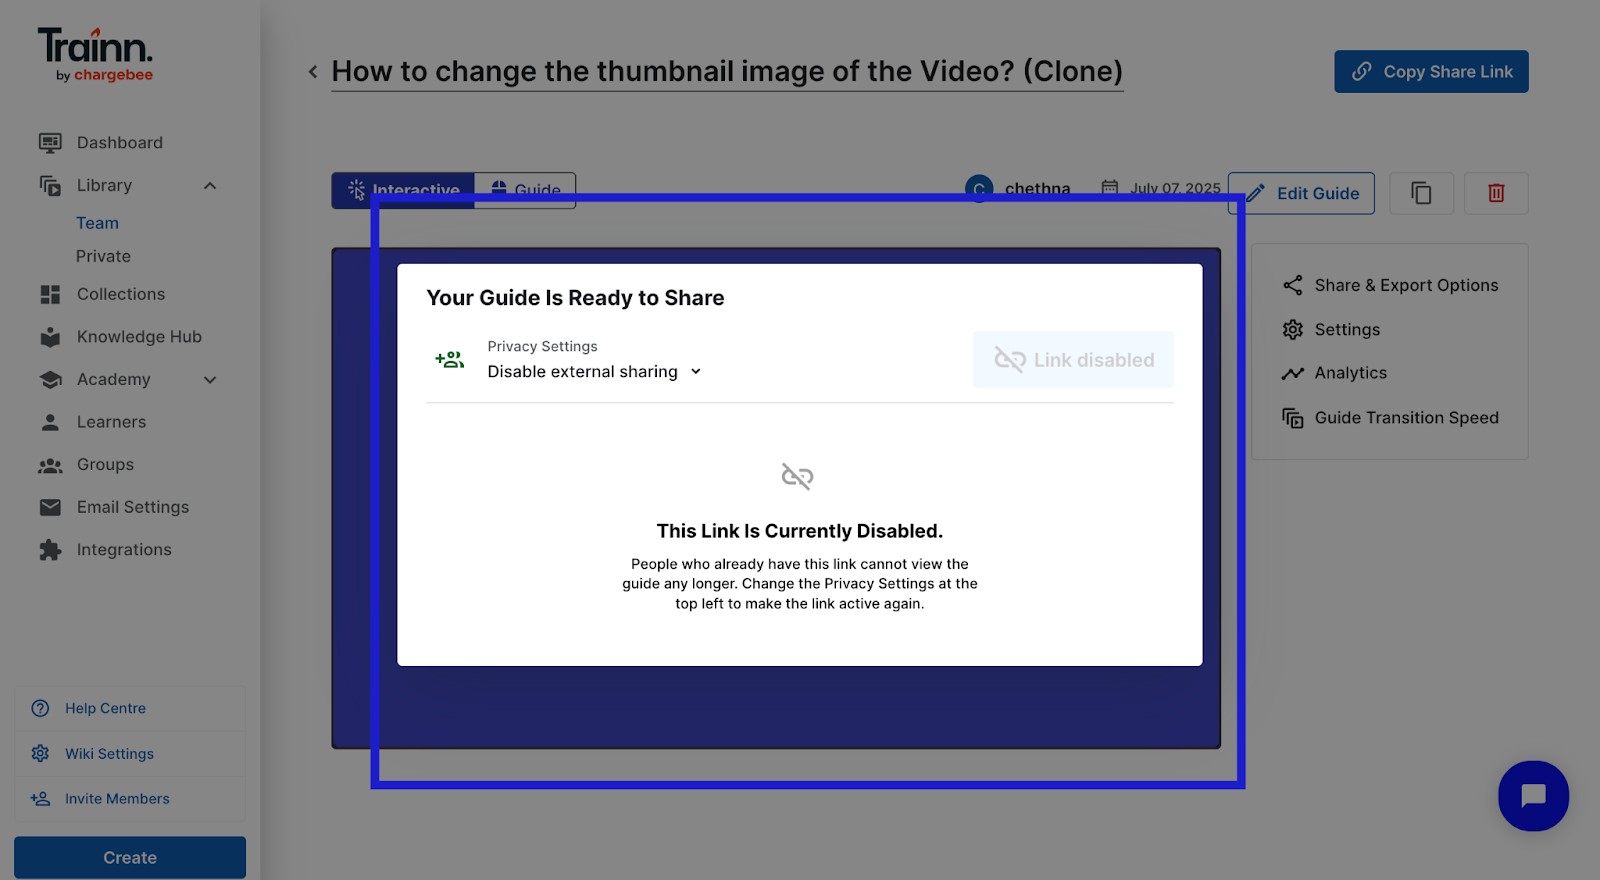
Note: This feature can be used to disable access to a guide, instead of deleting the guide from the platform. The guide will remain in Published State in your folder.

